
Case Study · Private Villa · Decorative Lighting
A chandelier drawn as a 3D model, and rebuilt in glass
The designer’s model was a sculpture. It had sizes, a colour and a finish, and nothing that told anyone how to make it. Three drawing issues and two glass samples later, it hangs through a double-height entrance.
The brief
An interior design studio in Dubai sent us a message on WhatsApp: a lighting schedule for a private villa, a set of renders, and one line for the entrance.
That line asked for large pieces of glass with a rippled texture on one side and a gradient of colour, held on a brushed brass structure, hanging four to five metres from the ceiling. The pieces came in three sizes, the tallest at 1350 mm. The rest was “as per reference picture”. Beside it, in the designer’s comment column: glass, not acrylic.
The designer’s 3D model followed. A beautiful one. It described a shape, and it said nothing about a material that could hold that shape at that size, where the light source would sit, or how the whole thing would hang from a ceiling. The brief was a sculpture. Our job was to turn it into something a workshop could build.
The first offer went back inside six days, with two options on it.
The risk was the jump from the render to the object
A model on a screen has no material. The moment it gets one, it gets limits.
The first offer was priced in acrylic. Printed in resin, it reaches the full length in one piece. Clear acrylic reaches 800 mm in one piece, so each size on the schedule would need a joint. The designer had already written what they wanted: glass.
A chandelier like this can go wrong quietly. Order it at the drawn size in the wrong material and you find the joint line when the crate is opened. Order it in the right material at a size nobody checked and you find out at the factory, after the money has moved. So the limits went to the designer before any order did.
We set the routes out side by side in one short document, and followed it with a meeting: the printed resin at full length, clear acrylic at the specified sizes with a joint, and the model rescaled so that every piece fitted inside one piece of material. Each route showed what it would look like and what it would cost. The rescaled route carried the planned construction: two glass shells, smooth inside, ridged outside, on a metal core carrying the light.
The designer chose that route, in glass. The shells were set at 625 mm and 525 mm tall.
Eight gates, in order
Each stage was agreed in writing before the next one was committed.
Enquiry, answered inside the week
A schedule line and renders, the 3D model close behind. The first offer went back in six days, with two routes priced.
Material options, limits stated
Printed resin, clear acrylic with a joint, or the form rescaled to fit one piece of glass. What each can and cannot do, shown before anyone committed to one.
Revised offer in glass
The chosen route written down: shell sizes, ripple on one side, smoky grey gradient from dark at the base to light at the top, brushed brass structure.
First drawing
The fixing detail, the five-metre drop, the 3000 K light source inside the core, the wire. The housing finish left open for the designer to set, not filled in for them.
Client comments, in writing
The fixing concealed above the ceiling, only the wire showing. The wire to match the brass. The metal to match a sample the designer supplied. All finishes to approved samples.
Revised drawing, samples on the sheet, stamped
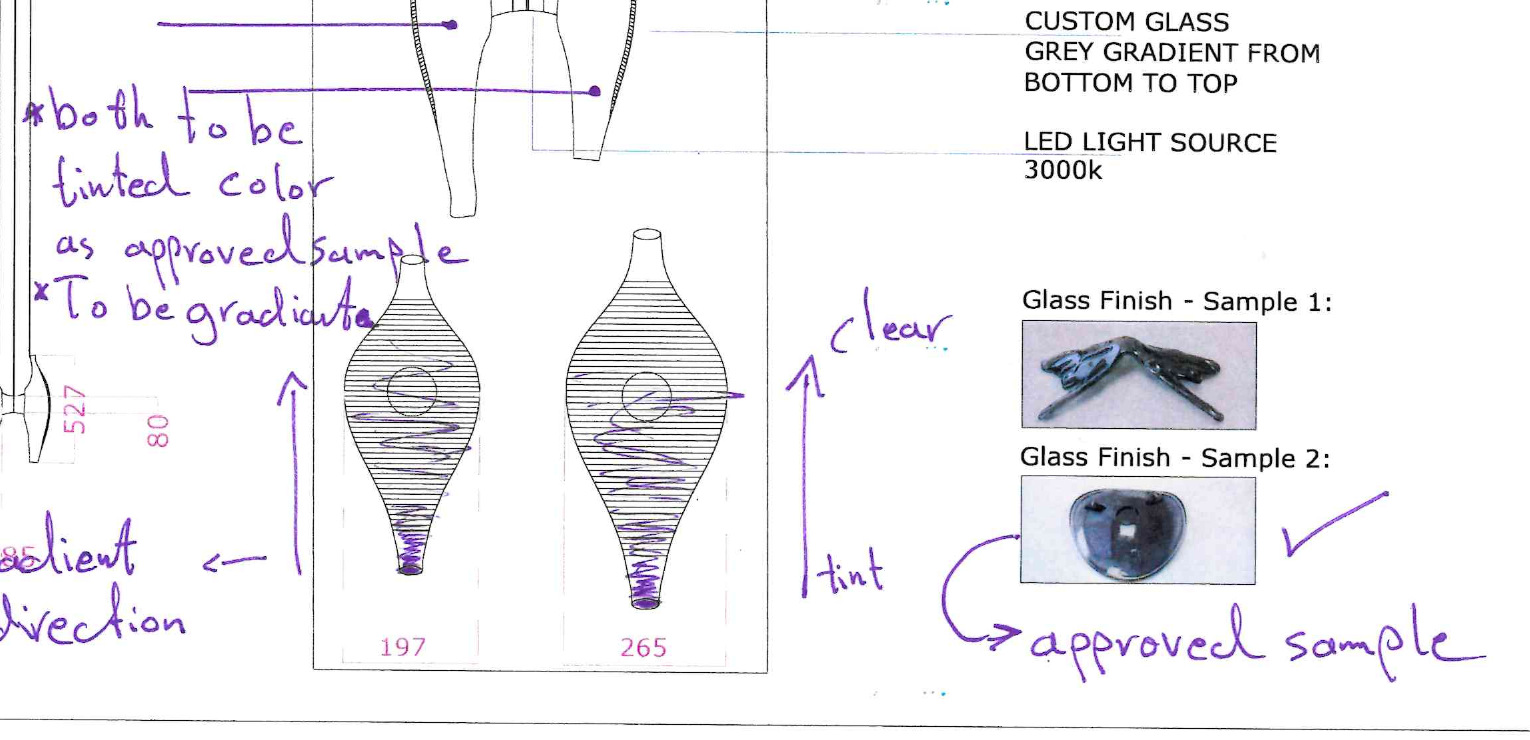
The designer’s metal swatch and two glass samples printed on the drawing itself. The designer marked one sample, wrote the direction of the gradient on the sheet, and stamped the sheet approved. Three drawing issues, about a month from the first to the stamp.
A mould, then production, photographed
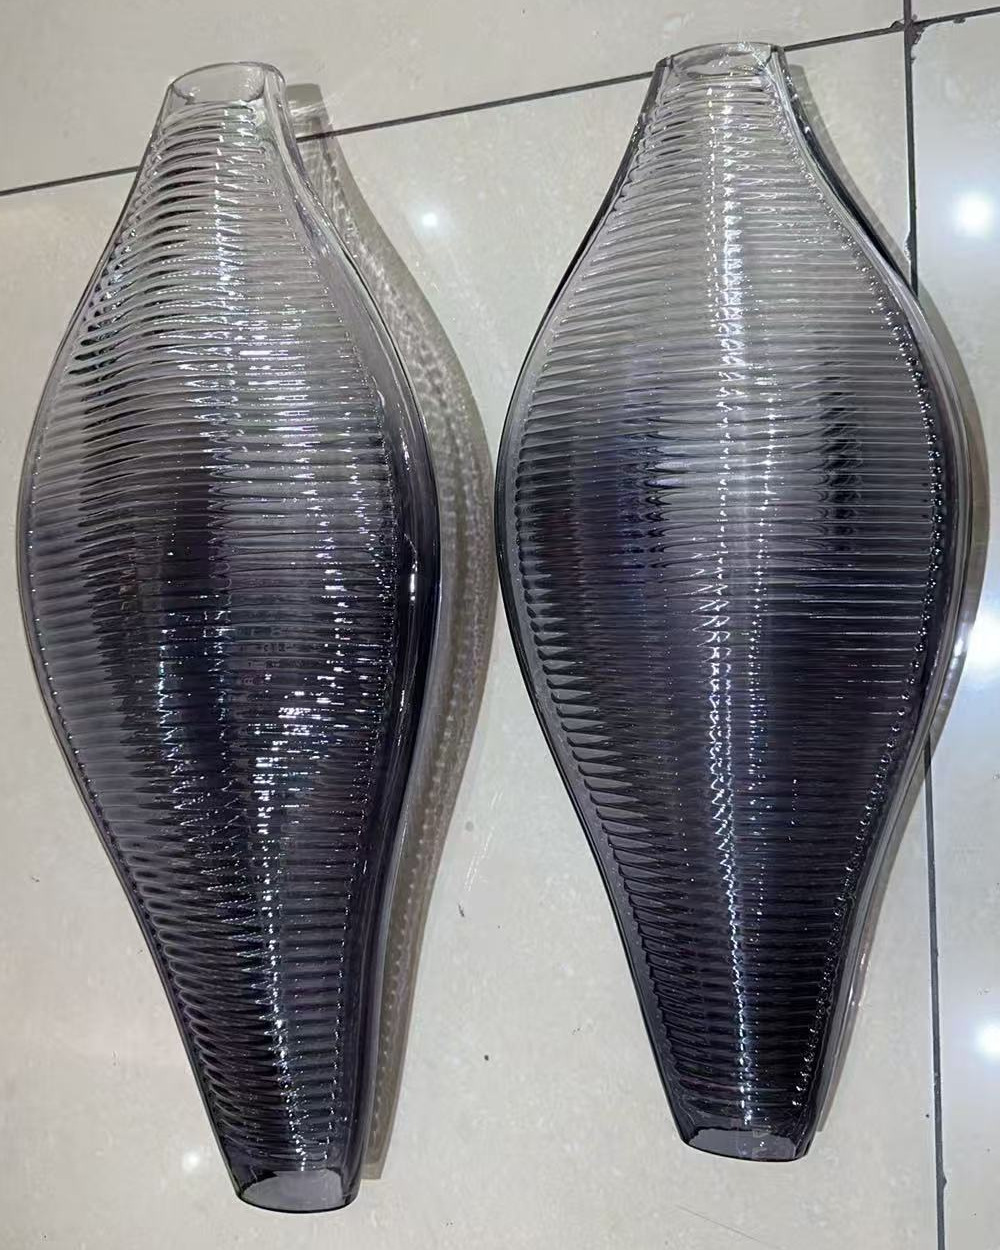
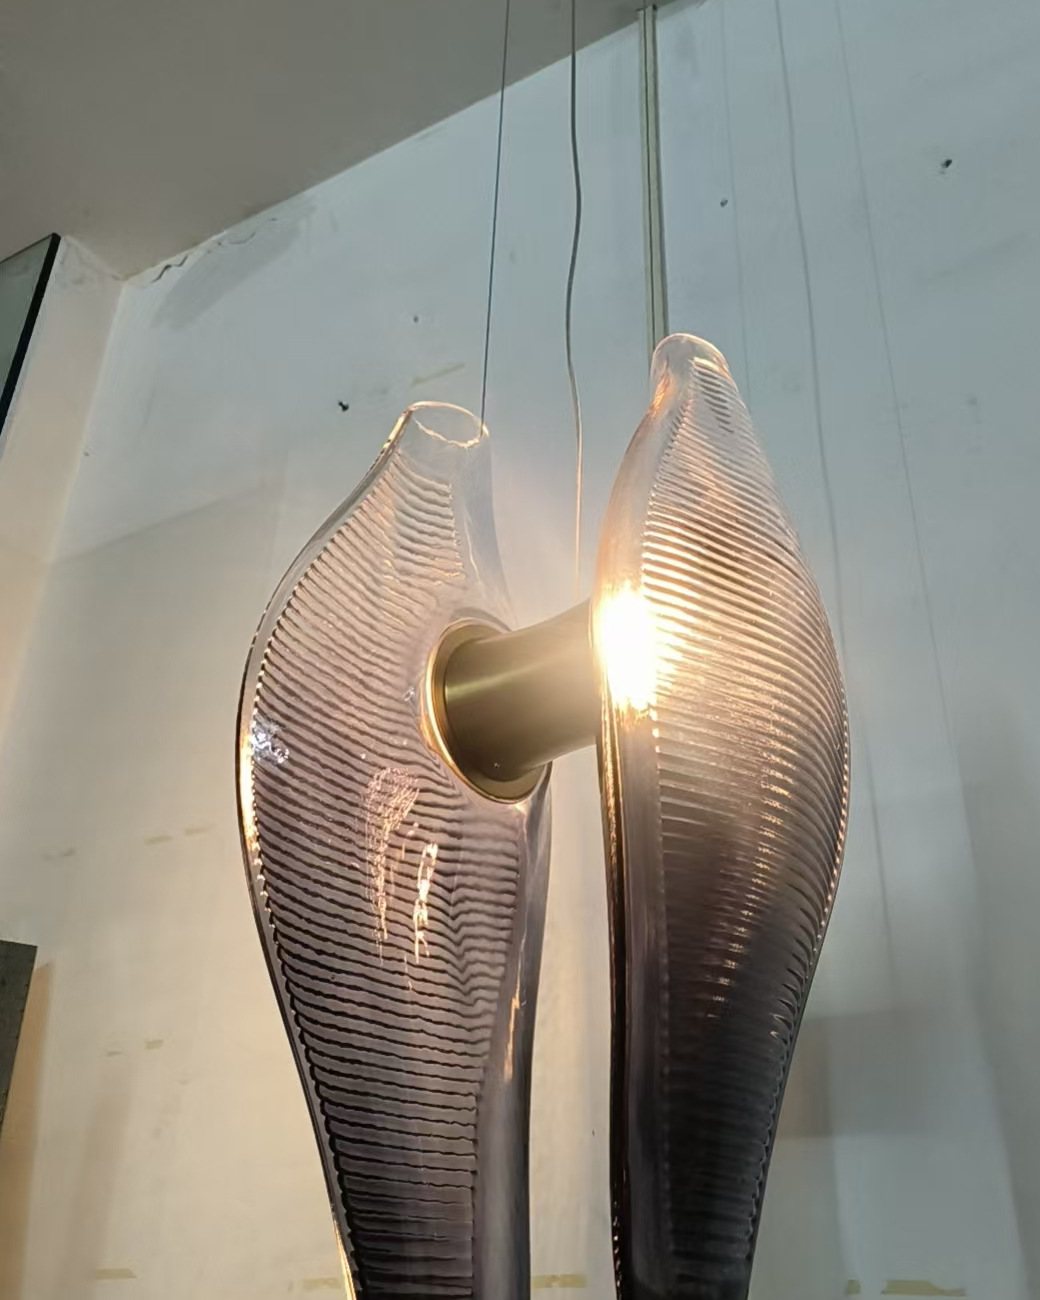
A mould made for this job, three to four weeks. Then the shells, clear, then tinted. Then the metal parts in their finish. Then one assembly hung and lit at production. The designer asked for progress photographs when they approved; the shells, the metal parts and the lit assembly are on file in photographs.
Delivered, then photographed in place
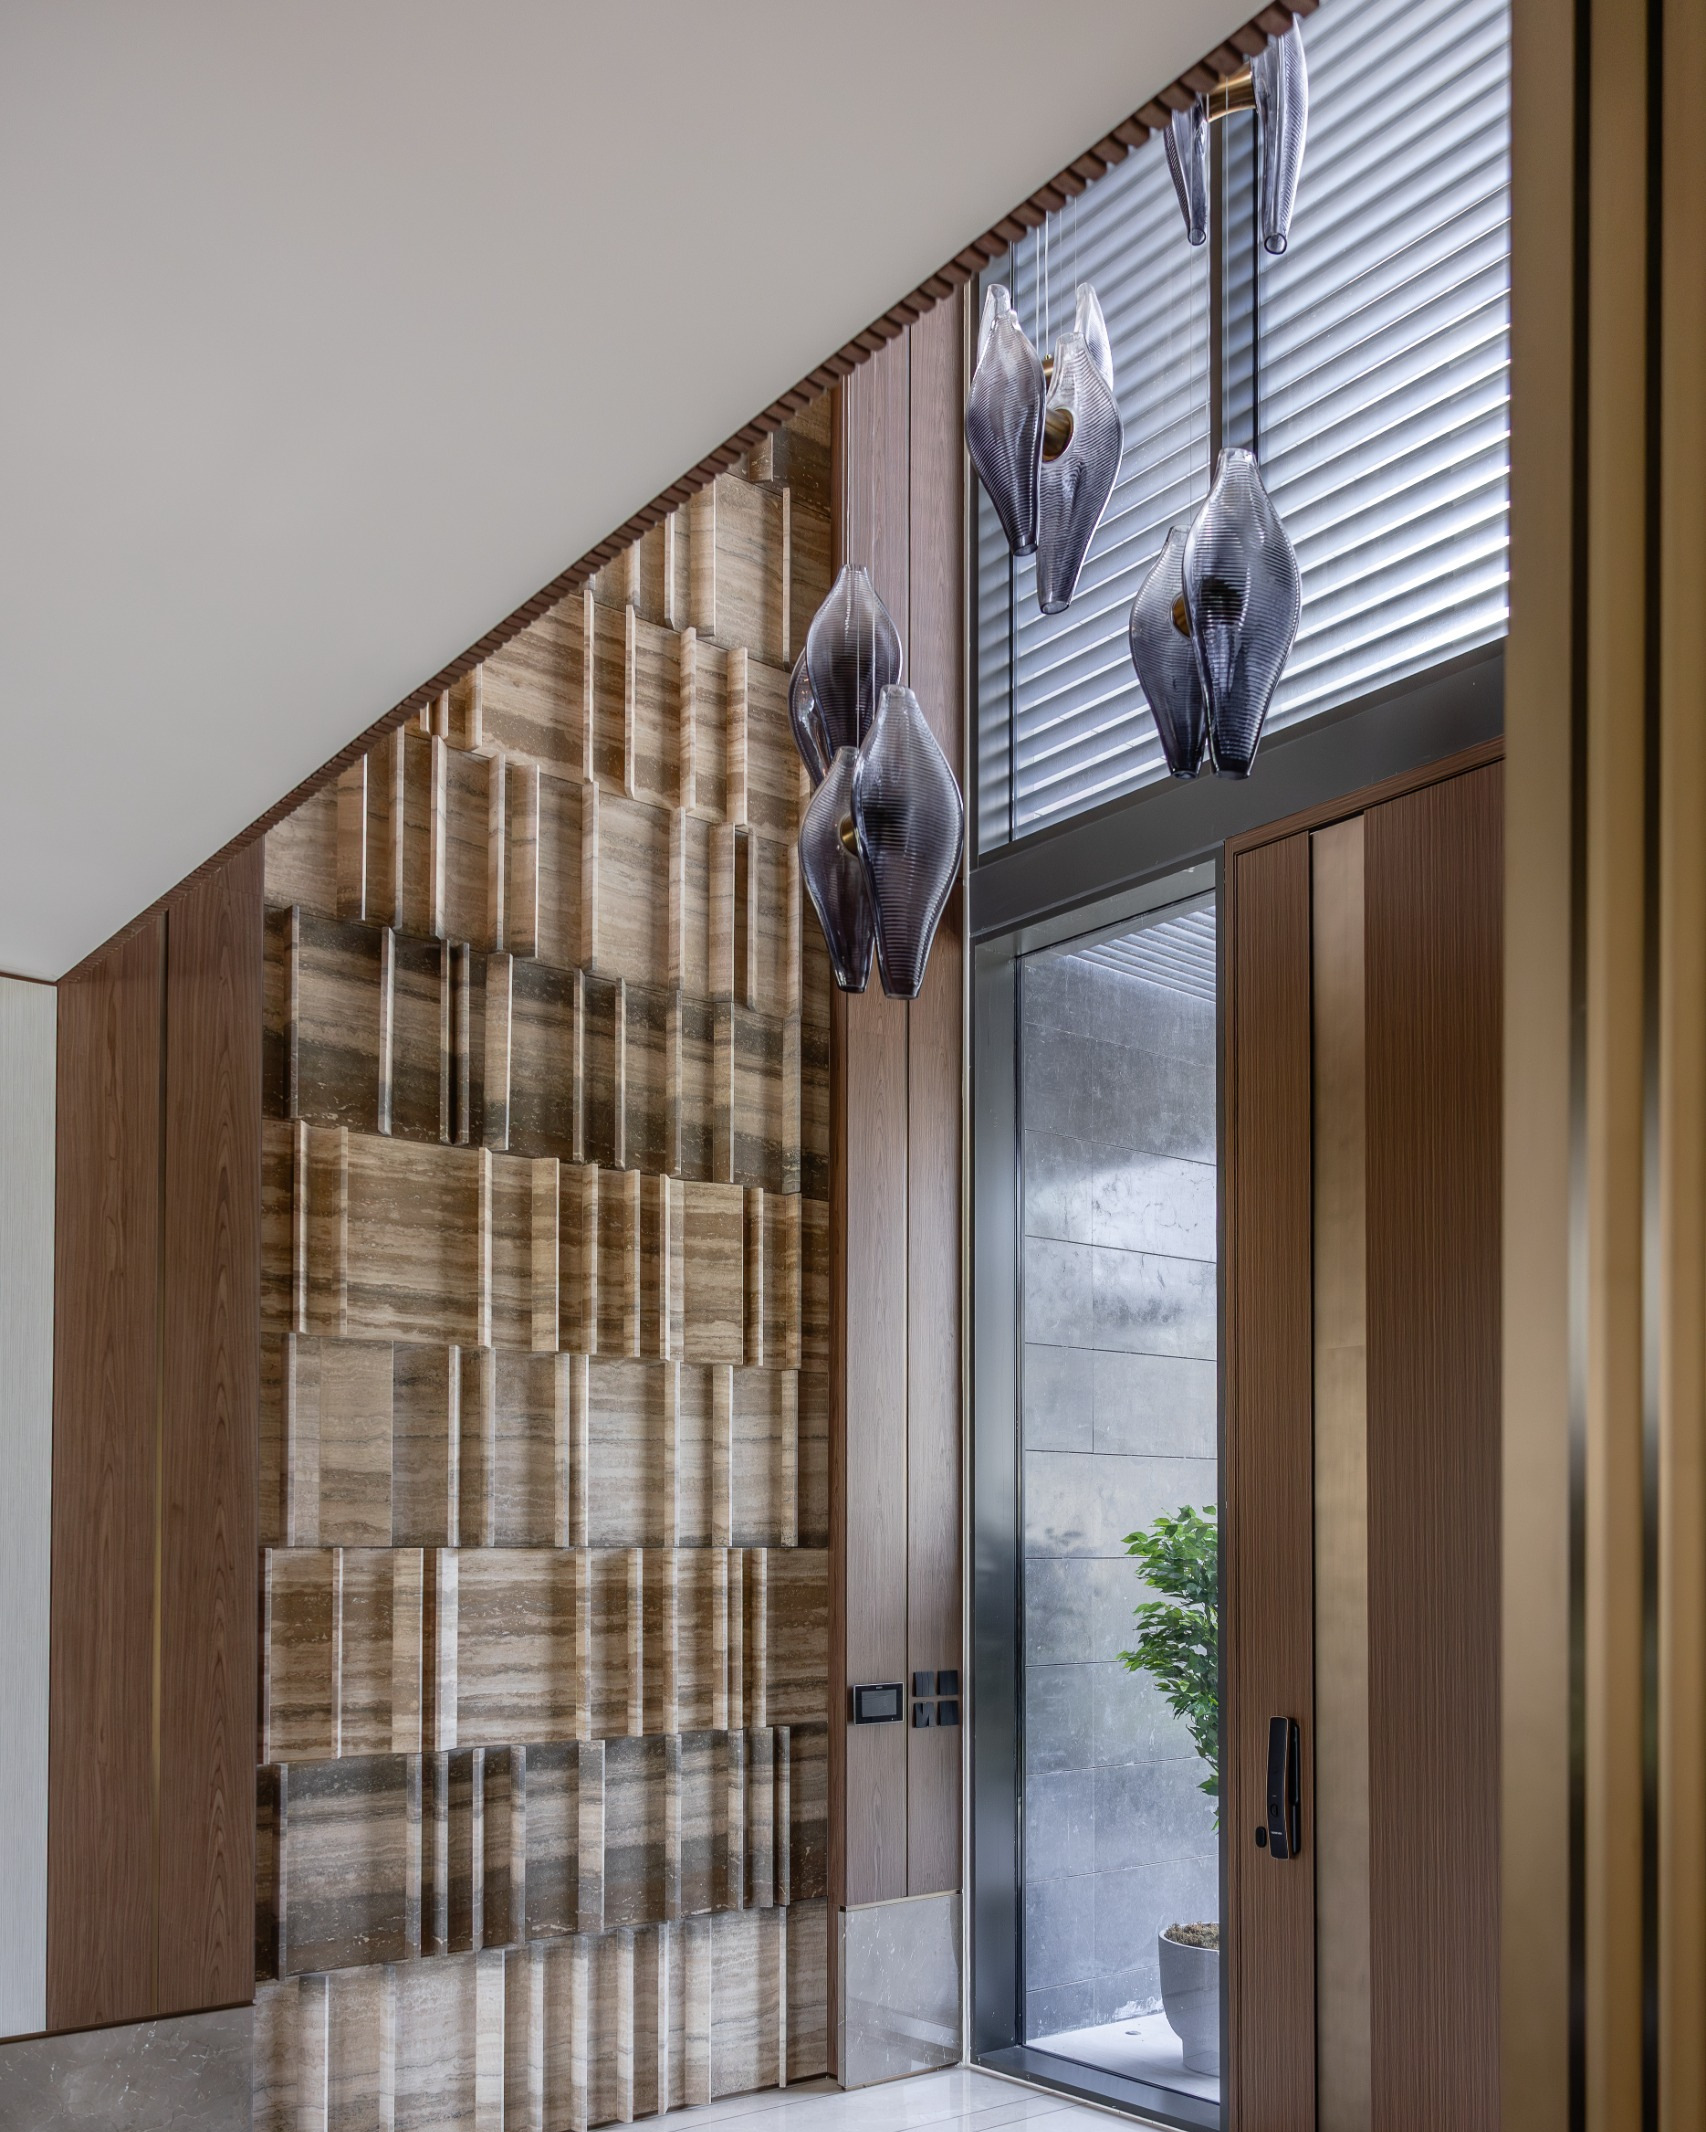
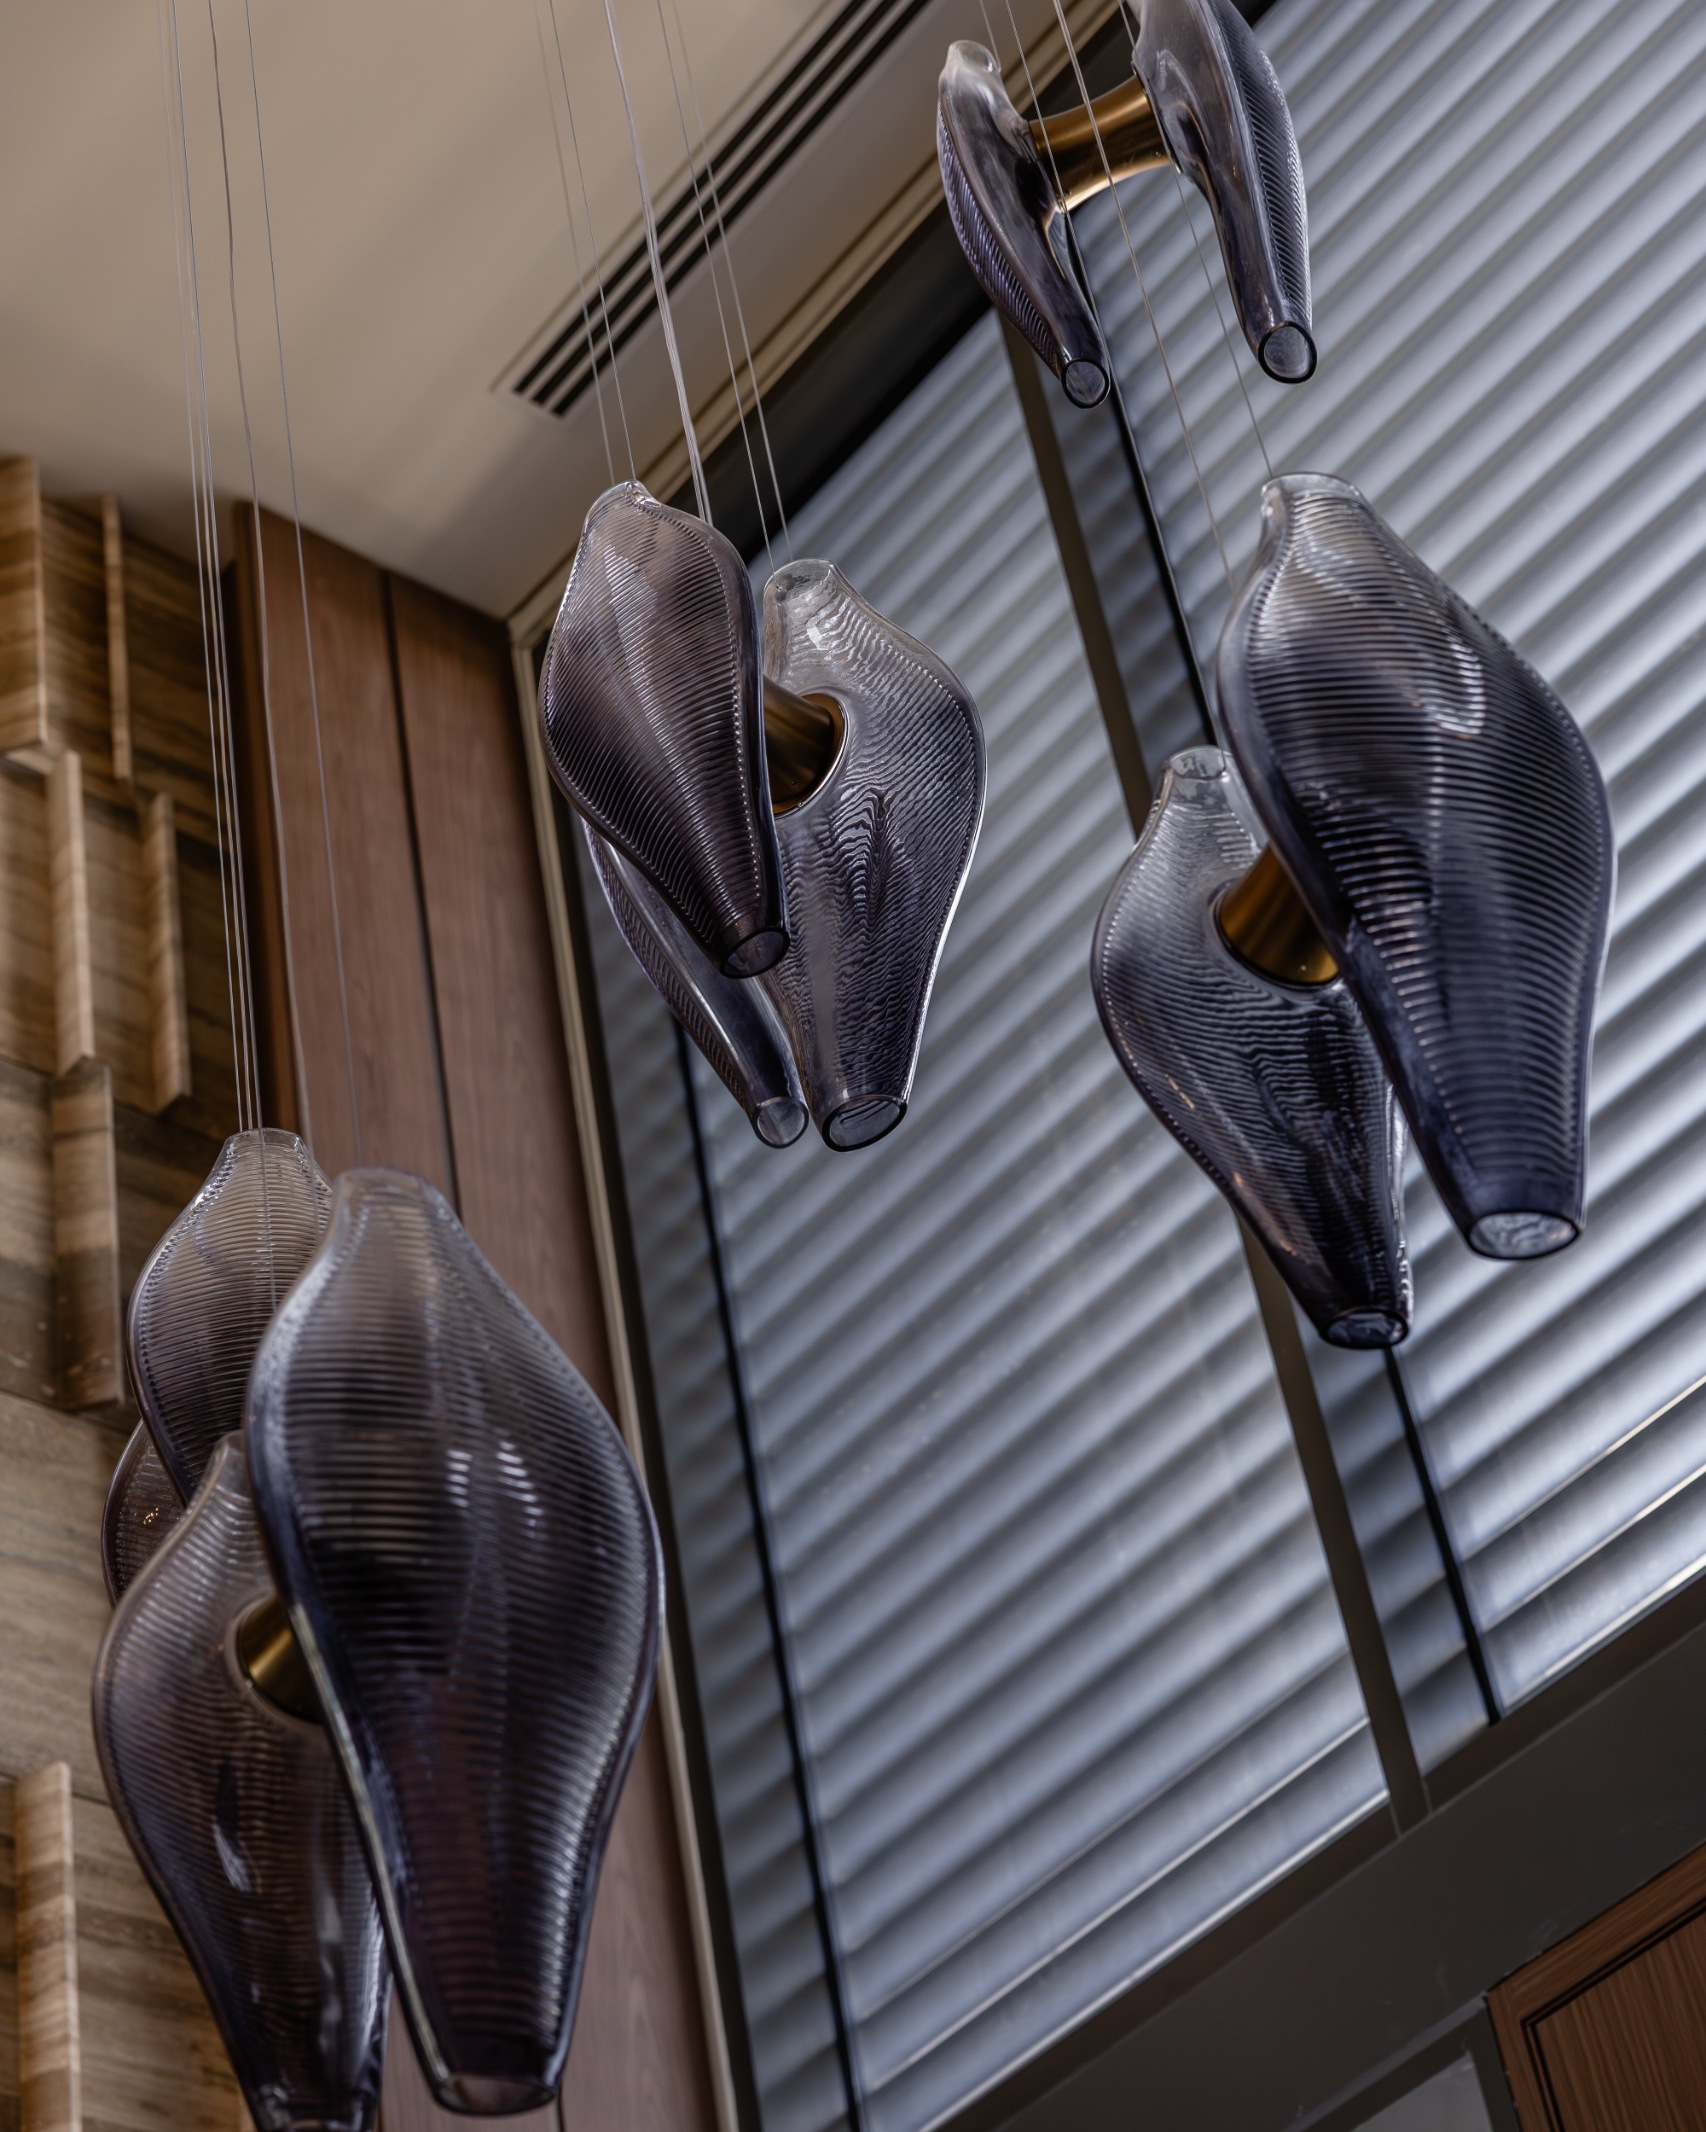
Delivered with a delivery note, then installed on site by others. The two site photographs on this page are of the installed chandelier in the finished villa.
Grey, brass, and which end is dark
Two finishes decide how this chandelier reads from the front door. The record shows both of them being decided by the designer, on paper, before production.
The sketches back from production proposed their own answers for the metal. One showed a copper tone. The next showed a smoke grey plated finish with a chrome base. Both are reasonable defaults. Neither was what the specification asked for, and choosing between them was not ours to do.
So our drawing adopted neither. The housing finish went on the sheet as “to be advised by client”. The designer came back in writing: match the sample we give you, make the wire match the brass, and finish everything to approved samples. On the next issue, the designer’s own metal swatch was printed on the drawing beside the housing it governed.
How the finish travelled
- Specification: smoky grey gradient, dark to light from bottom to top, brushed brass structure
- Production sketches: a copper tone, then smoke grey plating and a chrome base
- Our drawing: housing finish left open for the designer
- Designer’s comment: match their metal sample, wire to match the brass
- Revised drawing: the designer’s swatch on the sheet, two glass samples beside it
- Stamped: sample two, both shells tinted, clear at the top, tint at the base
- Production photographs: shells graded dark at the base, metal parts in a brass tone
The gradient mattered as much as the metal. The offer said dark to light, bottom to top. On the approved sheet the designer wrote it again by hand, “clear” at the top and “tint” at the base, against the sample they had chosen. The instruction that went to production was the one in their handwriting.
What this job took, and why it paid
Saying what the material cannot do, before the order. It is easier to take the render, quote the sizes and let the factory discover the limit. It is also how a client ends up with a joint line in a sculpture or a price that changes after the deposit. Setting out the routes cost us a document and a meeting. It meant the order was placed against a form that could be made.
A mould for one chandelier. These shells are not picked from a catalogue. A mould was made for this job, and it added three to four weeks before a single shell existed. That is the price of a form that belongs to the designer. A catalogue shape would have been quicker, and it would not have been their chandelier.
Lit once at production. One complete assembly was hung and switched on, with the shells on the core and the wires in place, and photographed. A fault found under a workshop ceiling is fixed with a spanner. The same fault found five metres up in a finished entrance needs scaffolding.
Scope
| Fixture | Specification |
|---|---|
| Entrance chandelier | Paired glass shells on a central core. Shells ridged on the outside, smooth inside, 265 × 625 mm and 220 × 525 mm. Smoky grey tint graded from dark at the base to clear at the top |
| Core and light source | Housing finished to the designer’s metal swatch. LED light source built into the core, 3000 K |
| Suspension | 1.5 mm steel wire and 3 mm transparent wire, finished to match the brass, drop up to 5000 mm. Fixing concealed above the ceiling; only the wire shows |
Material options, drawings, finish control, production follow-up and delivery: Arclite Middle East, Dubai. Production commissioned from a partner workshop to the approved drawing. Installation by others. Warranty terms are issued per project by Arclite Middle East.
Where it is now
Installed and lit in the double-height entrance of the villa.
Set the site photograph beside the stamped drawing. The shells are dark at the base and clear at the top, the metal finish matches the designer’s swatch, and only the wire meets the ceiling. Every one of those was a line on paper first.
Holding a render that nobody has worked out how to make?
Send us the model and the sizes. You will get the material routes back with their limits stated, before anyone asks you for a deposit.
Talk to usA note on this page. The design of this chandelier belongs to the interior design studio that drew it. The studio, the homeowner, the villa’s location and the production workshop are not named. Specifications, dimensions and the sequence of events are taken from the project’s own drawings and correspondence; durations are given, dates are not. The site photographs show the installed chandelier in the villa; the process photographs were taken during production. Every image is cropped only. Nothing in any photograph has been altered.
